Ceramic Slurry Defoamer: Selection & Dosing SOP for Body Slip and Glaze (with Starting Doses and Zero-Defect Validation)
TL;DR (30-second summary)
• Where to add:
Body slip → late-mill + continuous micro-dosing in the holding tank;
Glaze → after screen/magnet and right before application (low shear).
• What to choose:
Body slip → polyether / polyether-ester as baseline; consider mineral-oil blend for very high solids;
Glaze → silicone-free “de-gassing” types; use organically modified silicone only for body-slip emergencies, never on the glaze line.
• Starting doses:
Body slip 200–1000 ppm (mineral-oil blend 100–800 ppm); Glaze 50–400 ppm.
• Release gates:
Density variation ≤ ±0.005 g/cm³; glaze 0 pinholes / 0 fisheyes / 0 craters; spray-dry hollow rate ↓ or flat; no takt-time loss.
Why do ceramic slurries actually need a defoamer? (Mechanism and risk amplification)

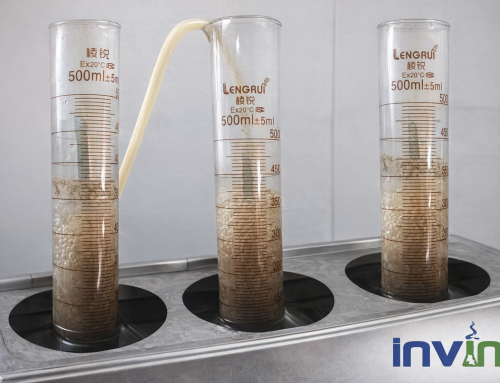
Body slip workflow: raw materials → ball mill → disperse/pH → screen/magnet → holding tank → feed to spray dryer.
Foam originates from high-shear milling, entrained air via dispersants/electrolytes, and pump aeration. Results: density swings, higher hollow-granule rate, and pressed density/strength variability that narrows the firing window and inflates rework.
Glaze workflow: glaze powder + water → disperse/fine-grind → screen/magnet → rheology adjust → application → drying.
The glaze face is extremely sensitive to low-surface-tension residues. Uncontrolled silicone or over-dosage of surfactants can trigger craters, fisheyes, and pinholes—a straight path to rejects.
Takeaway: foam drivers and tolerance differ by stage; one bottle for everything rarely works. You need line-specific defoamer plans and add-point discipline.
Body slip: ceramic slurry defoamer dosing SOP (spray-dry upstream)
Best add-points (in priority order)
-
Late-mill — add the first portion 5–10 minutes before mill discharge.
-
Holding tank — keep density stable via a metering pump (continuous micro-dosing).
-
Emergency — buffer tank or just before filter/screen to stabilize density and curb hollows.
Recommended chemistries & starting doses
- Polyether / polyether-ester: 200–1500 ppm (typical 200–1000 ppm). Robust vs. alkali/salts; low residue.
- Mineral-oil blend (very high solids/refractory mixes): 100–800 ppm. Strong hold-back for chronic entrainment.
- Organically modified silicone microemulsion: 10–200 ppm, emergency only, and keep it off the glaze line (strict asset segregation).
Operational safeguards (turn “right theory” into “stable reality”)
- Split dose: 50% at late-mill + 50% in the holding tank → steadier than a single slug.
- Continuous micro-dosing: tame density swings to ≤ ±0.005 g/cm³ (densitometer/pycnometer).
- Pre-dilute: 1:5–1:10 in process water to avoid oil eyes or localized overdosing.
- Compatibility: verify 24–48 h static compatibility with PAA, Na₂SiO₃/Na₂CO₃, SHMP and your dispersant system (watch for re-coagulation or viscosity spikes).
Prohibitions & risk controls
- Don’t add defoamer before dispersants have fully activated.
- Keep conventional silicone away from glaze assets (pumps, tanks, lines).
- Don’t “top-up by feel” — meter additions or you’ll re-foam and chase density.
- Run an alkali/salt stability check; otherwise expect phase split or slicks on tank walls.
Glaze: the glaze defoamer must be silicone-free (zero-defect is a veto gate)
Best add-point
- After screen/magnet and right before application, blended at low shear.
- Small make-up additions are acceptable in the recirculation pan/tray as needed.
Recommended chemistries & starting doses
- Silicone-free “de-gassing” defoamers (acetylene glycol/multi-polyol; low-residue polyether-esters): 50–400 ppm.
Rationale: rapid surface-tension drop to liberate micro-bubbles with minimal residue risk.
Validation & release criteria
- Draw-down or spray → dry → lab kiln.
- 0 craters / 0 fisheyes / 0 pinholes is a single-vote veto for release.
- Watch for flow marks/orange peel; tune dose and rheology (thixotropy) if necessary.
Prohibitions & risk controls
- Avoid conventional silicone emulsions on the glaze line.
- Acetylene glycol chemistries demand tight dosing; over-use may leave flow artifacts.
- Introduce at low shear to prevent new bubble entrainment.
Two-minute selection decision tree
- Near the glaze line? → Choose silicone-free de-gassing (polyether-ester / acetylene glycol). Ban conventional silicone.
- pH ≥ 10 or electrolyte-rich? → Favor polyether or mineral-oil blend; confirm alkali stability for acetylene-glycol types.
- Primary KPI? → Body slip: density stability / lower hollow rate. Glaze: zero visible defects.
- Need a short-burst fix? → Body slip only: organically modified silicone at low ppm, with hard segregation from glaze.
Formulation & Compatibility for Ceramic Slurry Defoamer (Glaze Defoamer Options)
Core chemistry families & why they fit
- Polyether / polyether-ester (baseline for body & some glazes)
Tunable HLB, inherently alkali/salt tolerant, low residue when dosed properly, and less prone to re-foaming than very high-HLB non-silicones. - Acetylene glycol / multi-polyol (glaze de-gassing)
Immediate surface-tension cut to free micro-bubbles before defects form; ideal where silicone residue is a non-starter. Dose discipline is essential. - Mineral-oil blend (body slip at very high solids / refractory)
Provides hold-back (anti-foam) to complement knock-down; best when pumps/valves continually entrain air. Keep away from the glaze line. - Organically modified silicone (body emergency only)
High instantaneous defoaming power; use sparingly, never on glaze assets, and maintain strict equipment/material segregation.
Proven compatibility checklist
- 24–48 h static test with PAA, sodium silicate/carbonate, SHMP, and your dispersant system.
- Check rotational viscosity / flow cup — avoid unexplained thickening.
- Pre-dilute 1:5–1:10 in process water; inject under low turbulence.
- Build a habit: split dose + micro-dosing beats one-shot additions.
Common mistakes and how to avoid them
- Over-dosing → oil slicks and surface flaws, including short-shots on the glaze face.
- Very high-HLB non-silicone → re-foaming or viscosity creep.
- Silicone crossing the glaze boundary → fisheyes/craters (treat as cross-contamination; fix procedures, not only chemistry).
- Fighting your dispersant → re-coagulation or viscosity spikes (do the 24–48 h static check).
- Unmetered make-up → density drift and rising hollow rates.
- Skipping alkali/salt stability checks → phase separation on the loop.
FAQ (body & glaze, the five most asked)
Q1: Why must the glaze defoamer be silicone-free?
Because the glaze face is highly sensitive to low-surface-tension residues; conventional silicone leaves a trail that causes craters/fisheyes. Choose silicone-free de-gassing (polyether-ester / acetylene glycol) and prove zero defects in the lab kiln.
Q2: Body slip foams badly, but the glaze line hates silicone—what now?
Use polyether / mineral-oil blend in body slip and segregate those assets. Run a dedicated silicone-free package on the glaze line.
Q3: Why do very high-solids systems seem to “re-foam”?
Entrained micro-bubbles and shear-induced dissolved gas keep recycling. Micro-dosing stabilizes density (≤ ±0.005 g/cm³), and a mineral-oil blend adds hold-back for chronic entrainment.
Q4: What are safe starting ladders?
Body slip 200–400 ppm; glaze 50–100 ppm. Use foam half-life plus lab-kiln visuals as the two-key release decision.
Q5: How do we define “pass”?
Four gates — stable density, 0 glaze defects, hollow-rate flat or down, and no takt loss.
<h3 id=”cta-title”>Ready to get results?</h3>
<p>Use our tools or talk to an engineer today.</p>
<div class=”cta-actions”>
<a class=”btn btn-primary” href=”/downloads/ceramic-defoamer-dose-ladder.xlsx”>Download Template (Excel)</a>
<a class=”btn btn-secondary” href=”/contact/process-review”>Free 15-min Call</a>
<a class=”btn btn-ghost” href=”/samples/ceramic-defoamer”>Get Samples</a>
</div>
</section><style>
.cta-card{background:#f8fafc;border:1px solid #e5e7eb;border-radius:14px;padding:20px;margin:28px 0}
.cta-card h3{margin:0 0 6px;font-size:1.2rem}
.cta-card p{margin:0 0 12px;color:#475569}
.cta-actions{display:flex;flex-wrap:wrap;gap:10px}
.btn{display:inline-block;padding:12px 16px;border-radius:999px;text-decoration:none;font-weight:600;border:1px solid #e5e7eb}
.btn-primary{background:#2563eb;color:#fff;border-color:#2563eb}
.btn-primary:hover{opacity:.95}
.btn-secondary{background:#fff;color:#0f172a}
.btn-ghost{background:transparent;color:#475569}
@media (max-width:640px){.cta-actions{flex-direction:column}}
</style>